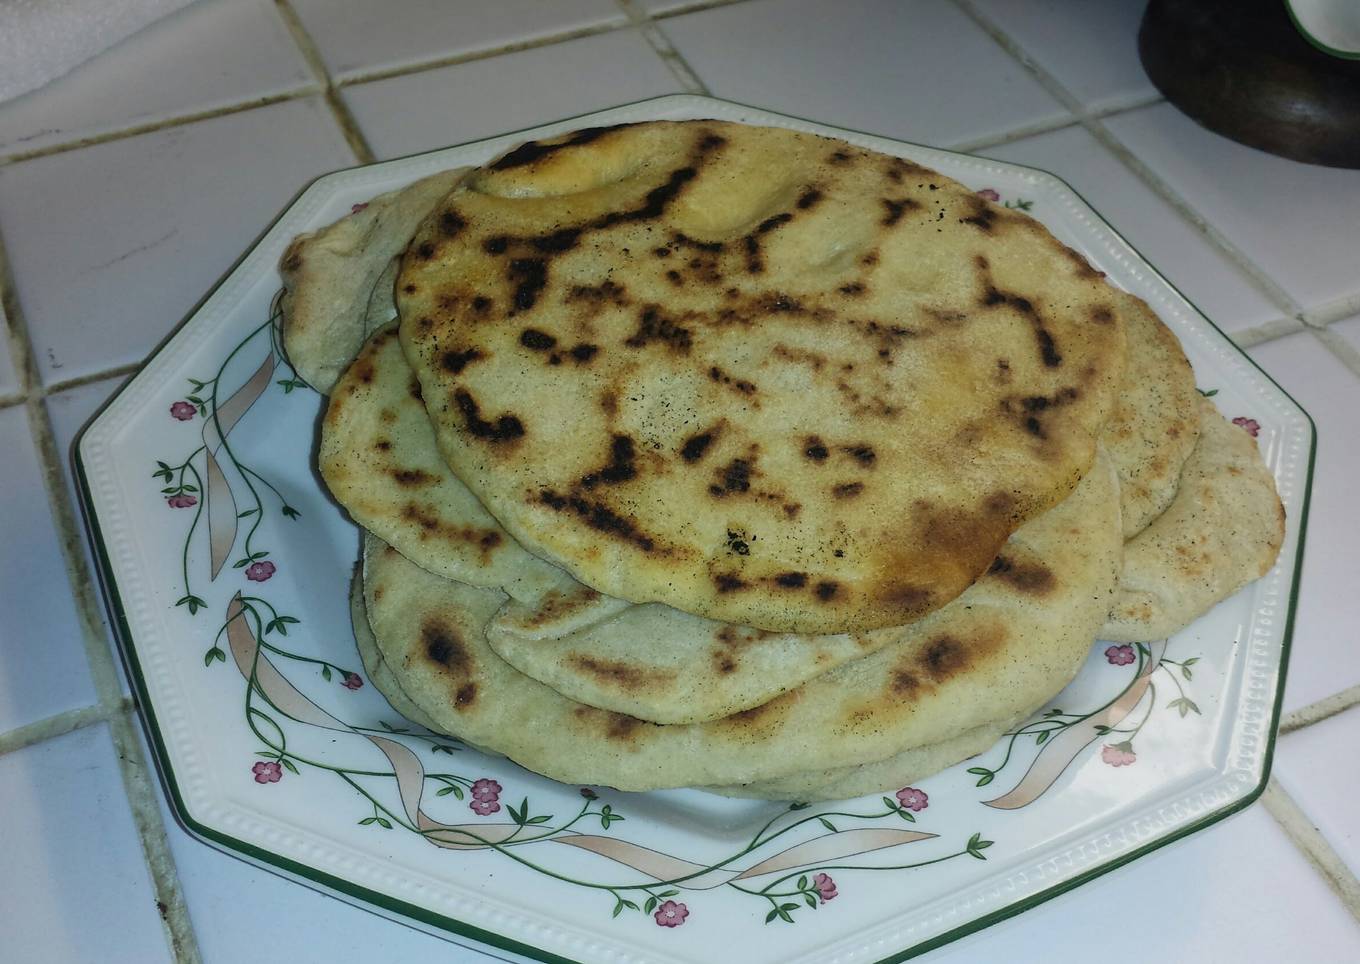
Homemade Pita Bread
Hey everyone, it's Drew, welcome to my recipe site. Today, we're going to make a special dish, Homemade Pita Bread. One of my favorites food recipes. This time, I'm gonna make it a bit tasty. This is gonna smell and look delicious.
Homemade Pita Bread is one of the most popular of current trending foods on earth. It is simple, it's fast, it tastes delicious. It is enjoyed by millions every day. They are fine and they look wonderful. Homemade Pita Bread is something that I have loved my whole life.
Many things affect the quality of taste from Homemade Pita Bread, starting from the type of ingredients, then the selection of fresh ingredients, the ability to cut dishes to how to make and serve them. Don't worry if you want to prepare Homemade Pita Bread delicious at home, because if you already know the trick then this dish can be used as an extraordinary special treat.
As for the number of servings that can be served to make Homemade Pita Bread is 8 servings. So make sure this portion is enough to serve for yourself and your beloved family.
To begin with this particular recipe, we have to first prepare a few components. You can have Homemade Pita Bread using 5 ingredients and 11 steps. Here is how you cook that.
I didn't fancy a trip to the shops but did have all the ingredients at home so I decided to make the pita bread to go along with some kofta's I was making. I found this recipe on www.thekitchn.com
Ingredients and spices that need to be Take to make Homemade Pita Bread:
- 1 cup warm water
- 2 tsp active dry or instant yeast
- 3 cup all-purpose flour
- 2 tsp salt
- 1-2 tbsp olive oil
Steps to make to make Homemade Pita Bread
- To form the dough, mix the water and yeast together, let it sit for about 5 minutes until the yeast has dissolved.

- Add 2 1/2 cups of flour, (save the last half cup for kneading), salt, yeast mixture and olive oil. Stir until a shaggy dough forms.

- To knead the dough, sprinkle a little extra flour onto your clean work surface and turn out the dough. Knead the dough for about 5-7 minutes, until the dough is smooth and elastic. Add more flour as needed to keep the dough from sticking to your hands or surface, but try to be sparing. It's better to use less than a lot of flour. If you get tired of kneading stop and let the dough rest for a few minutes before finishing kneading.

- In a clean bowl, grease with a little olive oil. Set the dough in the bowl and turn it until its coated with olive oil. Cover with a clean dishcloth or plastic wrap and let the dough rise until its doubled in bulk, approximately takes 1-2 hours.

- After step 4, you can refrigerate the dough until its neaded. You can store the dough in the fridge for up to a week, you can use one or two dough balls at a time and continue to follow step 6.
- Gently deflate the dough and turn out onto a lightly floured work surface. Divide the dough into 8 pieces and flatten each piece into a thick disk. Sprinkle the pieces with a little more flour and then cover them with a kitchen towel or plastic wrap until ready to bake.

- Using a rolling pin, roll each piece individually into a 8-9 inches wide and about a quarter inch thick. Lift and turn the dough regularly as you roll to make sure the dough isn't sticking to the work surface. Sprinkle with a little extra flour if it starts to stick. If the dough starts to spring back, set aside for a few minutes, then continue rolling. Repeat the process with the other dough pieces.

- You can either bake the pita bread in the oven or on the stove. From this step you can chose either.
- To bake in the OVEN, while shaping the pitas, preheat the oven to 450f/gas mark 8/ 220c. If you have a baking stone, put in the oven to heat. If not place a large baking sheet in the middle rack to heat. Place the rolled-out pitas directly onto the stone/sheet as many as will fit on it and bake for 3 minutes. It'll start to puff up after a minute or so. The pita will be done when it's fully ballooned. Cover baked pitas with a clean dry dishtowel while cooking any remaining pitas.
- To bake on the STOVETOP, warm a cast iron over medium to high heat. Drizzle a little olive oil in the pan and wipe any excess. Lay a rolled-out pita on the skillet and bake for 30 seconds, until you see bubbles starting to form. Flip and cook for 1-2 minutes on the other side. Flip again and toast the other side for a further 1-2 minutes.

- The pita should start to puff up during this time. If it doesn't or only small pockets form, try pressing the surface of the pita gently with a clean towel. Keep the cooked pitas covered with a clean dry dish towel while cooking any remaining pitas.
As your experience and self-confidence grows, you will certainly locate that you have more natural control over your diet regimen as well as adapt your diet regimen to your individual tastes over time. Whether you wish to offer a dish that uses fewer or more ingredients or is a little bit essentially spicy, you can make basic changes to attain this goal. To put it simply, start making your dishes in a timely manner. As for standard cooking abilities for beginners you don't need to discover them however only if you understand some simple cooking methods.
This isn't a complete guide to fast as well as simple lunch dishes however its excellent food for thought. Ideally this will obtain your imaginative juices moving so you can prepare delicious meals for your family without doing a lot of heavy meals on your trip.
So that is going to wrap it up for this special food Simple Way to Make Any-night-of-the-week Homemade Pita Bread. Thank you very much for reading. I am sure you can make this at home. There is gonna be interesting food in home recipes coming up. Remember to save this page in your browser, and share it to your family, friends and colleague. Thank you for reading. Go on get cooking!


Comments
Post a Comment